Showing posts with label DIY projects. Show all posts

Stepping Stone Fun

Yesterday I was our biggest class with the kids at my other work. We have three classes on a Saturday, once a month. Normally 15-25 each class. We expected 90-100 however. Yeah. Thankfully it was more than just myself and the other two regular workers.

I run the registration and check in normally. I had to do that, plus bring the stepping stone forms, and get the kiddos situated. I don't think I barely had a chance to rest for three hours. And I loved every minute of it!

But the downside to being so busy, was that I only got two pictures!
So what do we do? Kiddos get a choice of a flower, heart, circle, square, or hexagon (or whatever has been poured) form that's been filled with cement.

They hop on over to one of the 'work tables' aka a stack of lumber that we threw plastic on and get decorating!  We have glass beads, broken china plates, screws, nails, and letter stamps.

Paper towels to dry the too wet cement and buckets of warm water for cleaning are at hand too.


That's my friend's daughter :) 

I love the creativity that comes flowing out of the kids. They can design however and whatever they want and it will last for a long time! And all for $5!  I made one too, with stamps and porcelain plate pieces (mosaic flower) but forgot to snap a pic. I'll post a pic after I go pick it up later next week when it's dry.

You can do this at home too! You just buy a plastic form, stamps/jewels, and the mix. I know our boys were using Sakrete mix, but you can buy some online too if your hardware store doesn't have any.


  post signature
0

Monday Made It: Bookmarks

Yay, I'm finally doing Monday Made It again :) I was used to the weekly and then I got busy and now it's once a month, though I'm sure I could choose any Monday in the month, but I want to do the first Monday of each month. I even wrote it down in my calendar planner from Paper Coterie.

Blog stuff is in blue. And blurred out stuff are the teachers I'm subbing for. I've already got a lot going on this month!

Ok, anyway, back to Monday Made It! Remember how I scored thousands   a ton of paint chips and I've really done nothing with them? I decided to make some more bookmarks, but fall ones.

I really liked these that I saw on Pinterest.

Courtesy : Parentables via Becky on Pinterest

Now I was a little sad to read that the flowers were stamps. I don't have any cool stamps like that. Or material like that. So what did I do? I drew the flowers!

So I picked autumn colors: brown and orange swatches.

First attempt and I'm liking it!

On orange swatch. I love the names of the colors too!

Hole punched and with ribbon!


If you have a  project or want to look at others, hop on over to 4th Grade Frolics!


Photobucket

Photobucket
6

Monday Made It: Jumbo Paper Clip Bookmarks

Ever since I saw pics floating around on Pinterest from the blog Altered to Perfection of these clip bookmarks, I knew I wanted to make them!


What you need:
  • Ribbon
  • Jumbo paper clips
  • Scissors
That's it! I got my clips at Michael's. 

My Jumbo clips in green, purple, pink, and blue.

Picked out some coordinating ribbon.

The purple and green clips have three ribbons. They'll be gifts for two of my teacher gal pals I'll see tomorrow.

The blue and pink clips have only two ribbons on them, but I love them like that! 
They turned out soooo cute!


Photobucket
10

Monday Made It : T Time

I had another "T" left from Walmart, my 20 cent find! This time I had no idea what I was going to do until I glanced over at my art cart and saw my heaping pile of ribbons.

Plain and ready to go!

Ribbons galore!

Started tying them on

Finished product with a ribbon around to hang it.

The back side looks cute with the ties all on it. Only problem I had is that this T is curved and kind of a funky shape, but I think it turned out cute!

Link up your projects for Tara's Monday Made It party!


Photobucket
0

Monday Made It #6

Well I was really hoping my next post on my blog was going to be about my 500 followers but I am one shy! If it wasn't about that, then I'm happy it's my Monday Made It post!

Linking up with Tara:


This week's Monday Made It is a two-fer. I made two things!

First was my own mod-podge.

Inspired by the Do It Yourself Divas, it was easy to make! Here is their DIY Mod Podge:

All you need is glue and water and a bottle. However much glue you put in the bottle, that's how much water you put in. And shake!


Here's mine:

I decorated the bottle up and so no one thinks it's milk! :)

Remember the wooden T's I found for $0.20 at Wal-mart? And the fabric I used for my pendant banner? Well I was inspired to use my Mod Podge on fabric.

My 20 cent T.


I put Mod Podge on the bottom of the fabric and then gave the whole top a bath. And don't worry, that little spot on the upper  right part of the T is covered now :)

Now I still have that other T do do something with...


Photobucket
7

Monday Made It #4

Happy Monday everyone! I'm having internet connection issues so I'm on a borrowed computer so I know that I can at least get my blog post in!

Here's my Monday Made It and I linked up with Tara !


Materials you need:
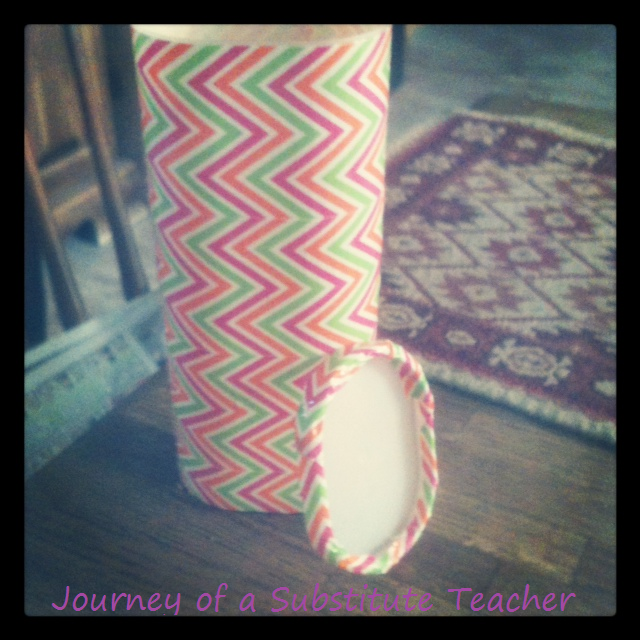
  • Empty container (I used Crystal Light)
  • Duck Tape
Optional
  • Label for container
I first got my two supplies ready.

Mmm appletini. It's so good!


I stripped my container free (it's naked!)


I dressed it up pretty by wrapping the tape around.

I even wrapped a trim around the lid!

Easy and FABulous! Love it! I may put a label on it saying "Time fillers" or something like that. I plan on writing quick activities/brain breaks on sticks and putting them in there. Then when I'm subbing and I have a spare minute (or more) , I pull out a stick and it has an activity, game, or brain break idea on it! I'm super excited about this.


Photobucket
14

Monday Made It #3 (and Giveaway Winners)

I'm linking up with Tara for my third Monday Made It!

I really feel like I am getting a lot accomplished this summer, thanks to Tara's linky party. I was actually worried that I'd be bored...ha! Between making Pinterest projects, this blog, Endless Pinabilities, creating products for my TN store, and my 'real' life and Saturday Market job, I'm feeling pretty busy!

Anyway, back to the Monday Made it :) This was pinned like crazy:

Courtesy Kinder Kraze via Vicky on Pinterest

Super cute. But I don't have a classroom. I do however, have a bedroom in need of more space, especially for my workout clothes and crafts (odd combo, but true!)

So I went to Wally World and picked me up one of these bad boys:

There was white and black, but I thought black was classier and meshed better with my room color.

I've seen others do over their draws with modge podge...but like Maria at Kinder Kraze, I decided to tape it. Plus I don't have modge podge (but I'm going to make some, another Pinterest idea!). The tape worked pretty well!


I love how it turned out! I decided to add my own flair by using the tiny bit of leftovers I had as middle stripe and I really like how it turned out. 

Now to decide what the next project should be...


Oh and before I forget, here are the 3 winners:
Congrats Emily B, Jessica A. and Brianne!


You have your choice of zebra, rainbow, dots, black dots, tie-dye, or owls math wall packs :) I'll be contacting you, so be on the look out for an e-mail!


Photobucket
11

Monday Made It #2

This is my second Monday Made It and I'm loving it!


This next craft was inspired by this:


Now I really love this, but I had to change a few things up. First off, I know I'd have the best intentions of putting a menu up each week, but I know that won't always happen. So I did put the days of the week, but didn't use my Cricut, I just wrote the days of the week. And I didn't put "menu" on top.

Border is The 3 AM Teacher and background is Mel Stampz.


First I got a frame from the Dollar Tree. I like the size of it but the one on Pinterest is 12x12 if you want a bigger frame and my Dollar Tree doesn't carry that size.


First you need a frame and your scrapbook paper to start with. I chose a lined scrapbook paper that looks like it's for school. Oh and I tried out Instagram to snap these shots :)


 I hand wrote the days of the week and then added other. But you could totally print labels or Cricut it.


Now there are so many options of what to use it for!


I really love the ribbon with the dry erase marker attached. I never have to hunt for one. And I bought a 3pack of red, blue, and black at the Dollar Tree. These markers have eraser caps too! Score :)

And speaking of crafting...this starts tomorrow! 


I posted this not too long ago and was surprised when I had a comment from someone who  participated on the show!!!! I was beyond thrilled :) She has a blog here.


Photobucket
11
Back to Top